▼
Wednesday, March 30, 2011
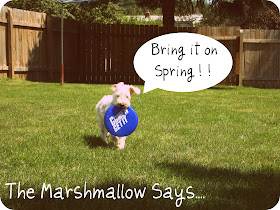
praying for frisbee weather
Hurry up nice weather!
Please feel free to comment on how cute the Marshmallow is.
that is all for today :)
Tuesday, March 29, 2011
The Best (pumpkin) Coffee Cake Ever.....
A friend of mine brought the most amaaaaazing coffee cake to our ladies bible study last week. It was such DIVINITY that I knew I should share it with my sisters.
16oz pound cake mix
3/4 cup canned pumpkin
6 Tbls water
2 eggs
2 tsp pumpkin pie spice
1tsp baking soda
Topping:
1 cup dark brown sugar
1/2 cup flour
6 tsp butter, melted
In bowl combine 1st six ingredients. Beat on medium speed 3 min.
Pour half of batter in greased 9 inch square pan.
PUMPKIN COFFEE CAKE
16oz pound cake mix
3/4 cup canned pumpkin
6 Tbls water
2 eggs
2 tsp pumpkin pie spice
1tsp baking soda
Topping:
1 cup dark brown sugar
1/2 cup flour
6 tsp butter, melted
In bowl combine 1st six ingredients. Beat on medium speed 3 min.
Pour half of batter in greased 9 inch square pan.
Combine topping ingredients. Sprinkle half over the batter. Carefully spread with remaining batter. Sprinkle with remaining topping. Bake at 350 for 35-40 min.
.....In our bible study we are learning about being grateful.... I've learned thus far that TRUE gratefulness is so very different than what I thought it was. Our challenge for this week was to practice gratitude by looking around your home (or office... or wherever you happen to be) and just name the things that you are thankful for-- imagining that anything that you fail to express thankfulness for, will just disappear-- never to return. This exercise will reveal our hearts, and unfortunately for me... how truly ungrateful I am. Take the time to be thankful for the pile of laundry-- it is evidence that you have a family. For the sink full of dirty dishes-- it is evidence that you have food on the table. For the walls that desperately need to be repainted-- they are evidence that you have a home. We will soon realize that even on our worst day we have much to be thankful for!
Let's practice TRUE Christ-centered gratitude-- it can change your life, your home... and most of all it blesses the very heart of God!
"I have learned that in whatsoever state I am in
therewith to be content."
Philippians 4:11
Saturday, March 26, 2011
More of what i ♥
ok, so since my house should be declared an "official state of emergency site" with all the remodeling going on...i'm back with some more of my favorite things...
Magnetic Paper Dolls from One Pearl Button
Pleated Headband from Craftiness is Not Optional
Lace Earring Frame from UCreate by the Trey & Lucy Blog
Silver Lining Rainbow Pillow from The Crafty Nomad
Spring Wreath from Loving Life in Full Bloom
Making Your Own Bias Tape from MADE
Printable Dots from AllSorts
Scrapbooks Made out of envelopes from A Pretty Life in the Suburbs
RicRac Rosettes from The Crafting Chicks
well...my paintbrush beckons...enjoy sistahs ♥
Friday, March 25, 2011
Mama and Baby Chick Craft....and How to Dye a Cotton Ball!
Happy Spring...I think... maybe once the latest blanket of snow melts! What is up with the snow, peeps? Hellooo... the calendar says it is Spring so it had better start to act like it! Despite the weather, we did a spring time craft with our four year old AWANA Cubbies group at church. I don't usually show any of the crafts we do with these little friends because so many of the "seven sisters" are there as leaders that this is old news! But, this craft is very sweet and there might someone out there in blogland looking for a craft for preschool age kiddos.
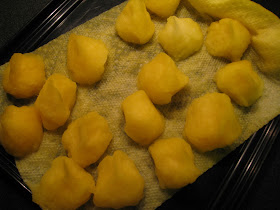
First, let me tell you that last year was the first time I attempted this craft and it was a hilarious disaster! You can't see it yet but underneath the "mama bird" are baby chicks made out of cotton balls. The catch is, the cotton balls are yellow. Apparently, when my son made this craft in preschool about six years ago, cotton balls were available in various colors. I couldn't find them anywhere so I started brainstorming how to make my own yellow cotton balls. I tried a few ideas...rubbing them with yellow chalk (not much color), spray painting them (lots of color but kinda crunchy...crunchy chicks? Not good), so I searched on line how to dye them. It seemed simple enough, dip them in a solution of water and food coloring and then dry them on paper towels. So, this is what they looked like after I dipped them...
...and that is pretty much what they looked like after they dried...and it took days!! I remember texting "S" in a panic because I was supposed to do this craft and my "baby chicks" were yucky blobs of matted cotton. I think we played games that night instead of doing a craft and it was back to the drawing board! I finally decided to try putting the soggy lumps into my dryer...scary, I know, but it worked! They came out as cute little fluffy, perfectly round yellow balls! Success!
I did wipe down the inside of my dryer after wards and then dried a load of dark towels before using it for a white load. I didn't think the Mayor would appreciate yellow undershirts.☺
Okay, back to the craft...color a small paper plate with green or brown crayon and then glue on a handful of green Easter grass. Use a black Sharpie marker to make dot eyes on three yellow cotton balls. Glue on little beaks cut from orange card stock paper and then glue the three babies in the middle of the Easter grass.
Now, for the Mama bird, you will need yellow card stock for her body and feathers and orange for a beak and two legs.
Cut the curved edges of the three feathers to make a fringe. Form the body into a cone shape and tape to hold. Glue the feathers and tail and legs and beak on using a glue stick. Attach some googly eyes with glue dots.
Now, place the Mama bird on the plate so she covers the three babies.
Cute!! The kids couldn't wait for their Moms and Dads to pick them up so they could show them the secret surprise under the Mama bird ☺ One of the little boys at "S's" table must have some background knowledge about baby birds because "S" said he was pretending the mama was feeding the babies and he definitely knew all about the whole regurgitation thing!! Eewww!
Jenn and I have "Little L" (Mar's daughter) at our table and she got her three little cotton ball babies glued down and they all had their little orange beaks facing up to the sky. She looked at them and said, "Oh look, my baby birds are singing to Jesus." Awwww....cute, cute.
Nel's smile for the week: Signs of Spring! Robins and buds on the trees!☺
Nel's frown for the week: Umm...it's all covered with SNOW!!???
Lulu's smile for the week: She is getting paid to make 30 Duct tape flower pens for a bridal shower in April!
Lulu's frown for the week: No sleeping in this weekend...it's All County weekend! They practice for 3 hours on Friday night, then get up early Saturday and practice a bunch more and then the concert is at 2 pm! Whew!
Monday, March 21, 2011
Sew Fashionable....
Ok...I have to admit...I have fallen in love...with my sewing machine. I am having so much fun figuring out what to create and make next. J...my list keeps getting longer and longer of all the things I want to make/create...I have ideas coming out of my ears and not enough time in the day!! So frustrating for us crafty folks!!!
So I have to share with you a project that with no ...literally ..no time on my hands was able to create...sew fashionably...(can't you tell..I'm pretty proud of myself..). Being a beginner at sewing it doesn't take much for me to feel accomplished!
With that being said... I again went searching on etsy for this sew fashionable project.
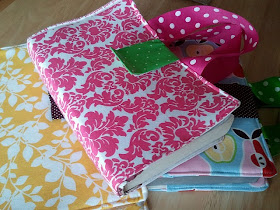
For awhile now I have been wanting to make a Bible cover for my two little girls Bibles to carry into church with them. Complete with handles and all. My Bible is my most treasured possession, and I pray I am teaching them every day how special and precious a book it really is. A year or so ago I had crocheted one for little L..but it just wasn't cutting it; it wasn't sturdy enough. Plus I wanted it to be super super cute! I found a perfect pattern on etsy from a seller known as LillyBlossom called a "sewing pattern book bag", it was so simple and had great pictures to walk me through each step. I had to make adjustments to the pattern sizes for the books in order for the slipcover to fit perfectly over their Bibles, I just made my own measurements and cut my fabric accordingly. I used ribbon instead of making handles out of fabric, but other than that I followed the instructions and they turned out beautiful. I even ending up making one for myself.
..the inside cover...
...front of the slipcover..with iron on Velcro for the closure flap I made for it (this was not part of the pattern I added it so that the Bible could be securely closed. I pretty much followed the directions for making a fabric handle, but made it shorter to fit perfectly as a closure flap instead)
..a view from the inside of the back cover..
..the one I made especially for me...I hope this has inspired your sewing projects as much as it has mine...
Sunday, March 20, 2011
wish list...♥
i have a birthday wish list....a craft list of projects that makes me giddy with craft adrenaline rush...to just sit down and create...and just make things that make me and the people i make them for, well...happy
presenting a few ("few" as in my bookmark folder is slowing my computer down "few")
special items in my bookmarks...
Rose Ring from Rubies & Pearls
Ruffled Skirt from Sew Dang Cute
Button Bracelets from A Dusty Frame
Crayon Holder from Somewhat Simple
Spring Napkins from The Purl Bee
Love Notes Box from Invarrantly Creative (by Eighteen25)
Toadstool Cottage & Mushroom House
from the little house by the sea
Calendar Journal from Design Sponge
Crystal Pendant from Little Birdie Secrets
Pretty Little Magnets from The Farm Chicks
these are a few of my favorite things (sung in my very julie andrews voice)
...that was fun!
...any sisters have favorite things that they shouldn't wait 'till their birthday to make? :)


