

Friday, December 31, 2010
Goodbye 2010... hello 2011!
Happy New Year's Eve. Hope you're all out painting the town red! We'll be back next friday, in the meantime enjoy some fireworks!


Wednesday, December 29, 2010
love-made, not homemade (or lemonade)
One of my favorite things around the holidays is homemade gifts. And as a giver of homemade gifts myself, I truly appreciate receiving homemade gifts, because I know firsthand how much effort and time can go into brainstorming and creating or finding the perfect gift for a friend or loved one. Not that store bought gifts don't have the same effect, they certainly do (case in point: awesome Vera Bradley address book from my mother in law or cool vintag-y looking necklace from my sister in law!), but as a crafter, I gotta say homemade gifts also have a special place in my heart!
So, as an after-Christmas special, I wanted to spotlight some of my special h♥memade gifts.

Numero Uno: Homemade food
One important thing you should know about me... I LOVE FOOD. From cranberry bread from my neighbor Patty to pear honey (which tastes awesome on toast with a little cinnamon) and spiced applesauce from ♥J to jam from Mar, I can't say much other than YUMMMMMM! In short, the applesauce is already gone and I'm working fast on the others....

Numero Dos: A bookmark from Nel
Holding it's place in one of my favorite Bible passages, a saweet bookmark from Nel! Seriously people, homemade gifts make me want to cry. Someone had to sit around, with their finger tapping their cheek, wondering what colors I might like or what style they see me as. LIKE. Keep it up sisters.


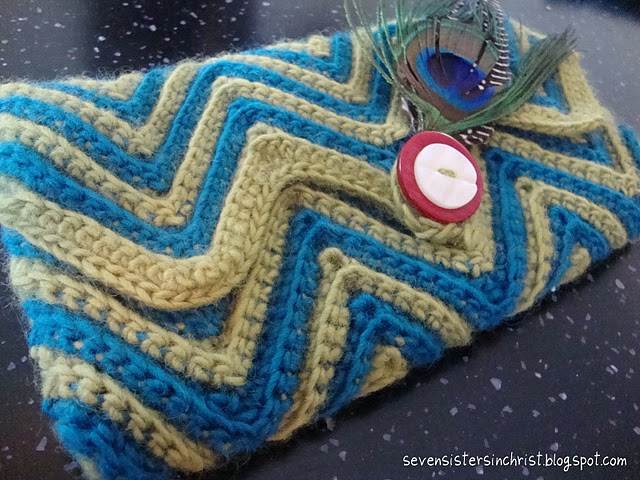
Numero Tres: Crochet goodies from Mar
This year the fam decided to do "secret santa"-ish gifting, and Mar had me as her secret giftee! I realize that I may be difficult to shop for, so she didn't do much shopping at all, just a lot of making! (and etsy shopping!). I am wearing my slippers right now and that clutch is all the excuse I need to get a new dress (despite the fact that it matches a few I already have!). If you're wondering what the Marshmallow is doing, he is sniffing my beautiful smelling feet.

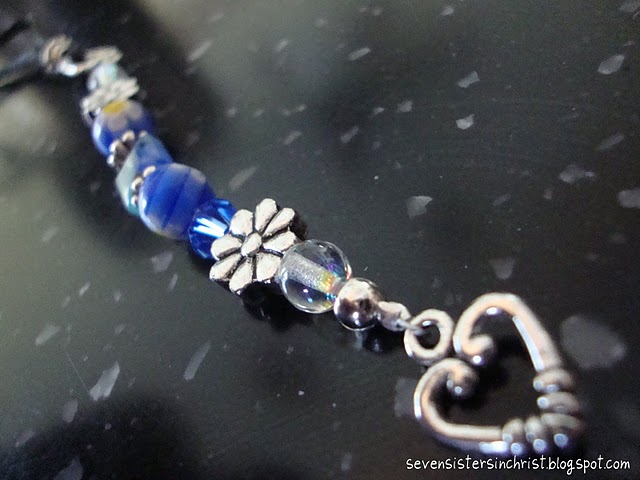
Numero Quatro: A bracelet from etsy
Ok, so no one i know personally made this bracelet, but I think it's perfectly acceptable to count handcrafted gifts in this category. This bracelet is a Pandora replica from Cookalas House of Cards on etsy. Eileen, the store owner, actually was able to get my bracelet out to me with lightening speed in time for Christmas, and I can't express more how professional and kind she was! I used my Christmas gift money to purchase the bracelet. Here is a link to a bracelet similar to mine. Use your Christmas cash to get one today!! (I was not paid or perked or flattered to post this either, I just really like my new bracelet!!) :) My sister also got me a neat peacock pin on etsy and I have an extra peacock feather charm to craft something with! Oh, the possibilities! (PS can you see a peacock theme anywhere? haha).
Numero Cinco: A CD from my husband
This CD has a special place in my heart! On a camping trip back when we were first married, friends of ours had a "classical rock" CD playing in their car. It's classic rock hits performed by an orchestra or string quartet, piano, etc. My husband loves classic rock classics, and we always joked that that kind of CD would be perfect to get our future kids loving classic rock even when they're really young. In all our years of marriage, we'd never been able to find this particular CD. So, this year for Christmas, my husband (secretly) researched, searched for and downloaded the songs individually off iTunes. It actually made the CD so much more meaningful, because he was able to choose songs that had special meaning to us, or that remind him of me (for ex., God Only Knows by the Beach Boys). Now we'll be prepared for when we have kids someday, and for now I can enjoy the classical orchestra music and think about how wonderful my husband is and how much he loves me :).
And just a few more photos from our Christmas Eve get together: hot cocoa bar
 lemon and cranberry water (idea shamelessly stolen from hubby's aunt)
 cranberry bread (compliments of my neighbor Patty) :)
Hope everyone's Christmas was as merry as mine was and that your heart is full of love- the best homemade gift there is!
So, as an after-Christmas special, I wanted to spotlight some of my special h♥memade gifts.

Numero Uno: Homemade food
One important thing you should know about me... I LOVE FOOD. From cranberry bread from my neighbor Patty to pear honey (which tastes awesome on toast with a little cinnamon) and spiced applesauce from ♥J to jam from Mar, I can't say much other than YUMMMMMM! In short, the applesauce is already gone and I'm working fast on the others....
Numero Dos: A bookmark from Nel
Holding it's place in one of my favorite Bible passages, a saweet bookmark from Nel! Seriously people, homemade gifts make me want to cry. Someone had to sit around, with their finger tapping their cheek, wondering what colors I might like or what style they see me as. LIKE. Keep it up sisters.

Numero Tres: Crochet goodies from Mar
This year the fam decided to do "secret santa"-ish gifting, and Mar had me as her secret giftee! I realize that I may be difficult to shop for, so she didn't do much shopping at all, just a lot of making! (and etsy shopping!). I am wearing my slippers right now and that clutch is all the excuse I need to get a new dress (despite the fact that it matches a few I already have!). If you're wondering what the Marshmallow is doing, he is sniffing my beautiful smelling feet.

Numero Quatro: A bracelet from etsy
Ok, so no one i know personally made this bracelet, but I think it's perfectly acceptable to count handcrafted gifts in this category. This bracelet is a Pandora replica from Cookalas House of Cards on etsy. Eileen, the store owner, actually was able to get my bracelet out to me with lightening speed in time for Christmas, and I can't express more how professional and kind she was! I used my Christmas gift money to purchase the bracelet. Here is a link to a bracelet similar to mine. Use your Christmas cash to get one today!! (I was not paid or perked or flattered to post this either, I just really like my new bracelet!!) :) My sister also got me a neat peacock pin on etsy and I have an extra peacock feather charm to craft something with! Oh, the possibilities! (PS can you see a peacock theme anywhere? haha).
Numero Cinco: A CD from my husband
This CD has a special place in my heart! On a camping trip back when we were first married, friends of ours had a "classical rock" CD playing in their car. It's classic rock hits performed by an orchestra or string quartet, piano, etc. My husband loves classic rock classics, and we always joked that that kind of CD would be perfect to get our future kids loving classic rock even when they're really young. In all our years of marriage, we'd never been able to find this particular CD. So, this year for Christmas, my husband (secretly) researched, searched for and downloaded the songs individually off iTunes. It actually made the CD so much more meaningful, because he was able to choose songs that had special meaning to us, or that remind him of me (for ex., God Only Knows by the Beach Boys). Now we'll be prepared for when we have kids someday, and for now I can enjoy the classical orchestra music and think about how wonderful my husband is and how much he loves me :).
And just a few more photos from our Christmas Eve get together:
 hot cocoa bar
 lemon and cranberry water (idea shamelessly stolen from hubby's aunt)
 cranberry bread (compliments of my neighbor Patty) :)
Hope everyone's Christmas was as merry as mine was and that your heart is full of love- the best homemade gift there is!

Monday, December 27, 2010
Dollhouse Revealed
 Finally, one week before Christmas, I finished the dollhouse for little L. I think I was more excited that she was to open it. But then again she had no idea what it was until she opened it. All she could do when she saw it for the first time was gasp! And she just stood there staring at it.That was the best reaction a mom could hope for. Then came all the giggles and shrieks that little girls do when they are in utter amazement at their good fortune. I'm so glad I got it all on film. All the hard work and glue gun burns on my fingers were all worth it in the end.
 This is a view from the front of the house. I modpodged between the shutters to give the outside a little bit of pattern.

This is a full view of the house, all set up. This is what little L saw when she opened it up.
 These are the little babies in the attic. All the furniture and bunnies are from calico critters. Which are so adorable and all the furniture came with all the little accessories.
 This is the little girl and boy room. I painted the stripes on the walls, made the curtains with stitch witchery, lollypop sticks and beads, made all the pillows out of felt and crocheted the rugs. Everything else was courtesy of calico critters.
 A little close up.
 This is the master bedroom. I modpodged the back wall, made the curtains and used a crocheted granny square for the rug. In this room I also made the bedding because the other bedding didn't match my decor :)
 ...the living room...
... and the kitchen...
This project was so much fun, and I am so happy that our family tradition will live on in my little girl. I hope she loves it and passes it on to her little ones in the future. (like S will be able to do).

Saturday, December 25, 2010
For us...♥
And it came to pass in those days, that there went out a decree from Caesar Augustus that all the world should be taxed.
And all went to be taxed, every one into his own city.
And all went to be taxed, every one into his own city.
And Joseph also went up from Galilee, out of the city of Nazareth, into Judaea, unto the city of David, which is called Bethlehem; (because he was of the house and lineage of David)
To be taxed with Mary his espoused wife, being great with child.
And so it was, that, while they were there, the days were accomplished that she should be delivered.
And she brought forth her firstborn son, and wrapped him in swaddling clothes, and laid him in a manger; because there was no room for them in the inn.
And there were in the same country shepherds abiding in the field, keeping watch over their flock by night.
And, lo, the angel of the Lord came upon them, and the glory of the Lord shone round about them: and they were sore afraid.
And the angel said unto them, Fear not: for, behold, I bring you good tidings of great joy, which shall be to all people.
For unto you is born this day in the city of David a Saviour, which is Christ the Lord.
And this shall be a sign unto you; Ye shall find the babe wrapped in swaddling clothes, lying in a manger.
And suddenly there was with the angel a multitude of the heavenly host praising God, and saying,
Glory to God in the highest, and on earth peace, good will toward men.
And it came to pass, as the angels were gone away from them into heaven, the shepherds said one to another, Let us now go even unto Bethlehem, and see this thing which is come to pass, which the Lord hath made known unto us.
And they came with haste, and found Mary, and Joseph, and the babe lying in a manger.
And when they had seen it, they made known abroad the saying which was told them concerning this child.
And all they that heard it wondered at those things which were told them by the shepherds.
But Mary kept all these things, and pondered them in her heart.
And the shepherds returned, glorifying and praising God for all the things that they had heard and seen, as it was told unto them.
HIS NAME WAS CALLED JESUS...♥
For God so loved the world, that he gave his only begotten Son, that whosoever believeth in him should not perish, but have everlasting life.


Friday, December 24, 2010
O Holy Night!

Merry Christmas Eve Sisters!
I have decided that Christmas Eve should be considered a separate holiday. It is an evening of anticipation for the next day and also a time of quiet reflection. It's a night to take a deep breath, because everything is done, the hustle and bustle of shopping is over, the gifts are wrapped, the menu is planned, it seems like now we can FINALLY focus on the celebration and not "getting ready". Christmas Eve is a time for Jesus and a time for family. We attend a Christmas Eve service at the church in my husband's home town. It is a midnight service by candle light and it is really quiet and beautiful.
O holy night!
The stars are brightly shining
It is the night of the dear Savior's birth
Long lay the world in sin and error pining
Till he appeared and the soul felt its worth.
A thrill of hope the weary world rejoices
For yonder breaks a new and glorious morn!
Fall on your knees
Oh hear the angel voices
Oh night divine
Oh night when Christ was born
Oh night divine
Oh night divine
Hands down my favorite Christmas song, I love when someone can REALLY sing it. My favorite is Billy Gilman, he is amazing! He belts it out here, live, at Disney back in 2000. I think he is 22 now so he was 12 in this clip...wow, his mom must be proud!
So, I wish all my sisters and their families a peaceful and divine Christmas eve, may our hearts be filled with gladness at the birth of our Lord and Savior!

In keeping with the cookie extravaganza of this week, here are the recipes I made for the cookie exchange. I made half of the recipe for The Chocolate Hazelnut cookies gluten free for sister S using the flour she gave us. They have Nutella in them along with ground hazelnuts. I found the hazelnuts, bagged, in the baking aisle right with the walnuts and pecans etc. I was actually surprised to find them so easily, I had visions of having to buy them whole and crack them open (you're right, I just would have picked a different recipe!) Anyway, then I ground them in my coffee grinder. I figured if a little nut-dust was left in the grinder it would just become hazelnut coffee (I'm a genius, I tell you, a genius!).
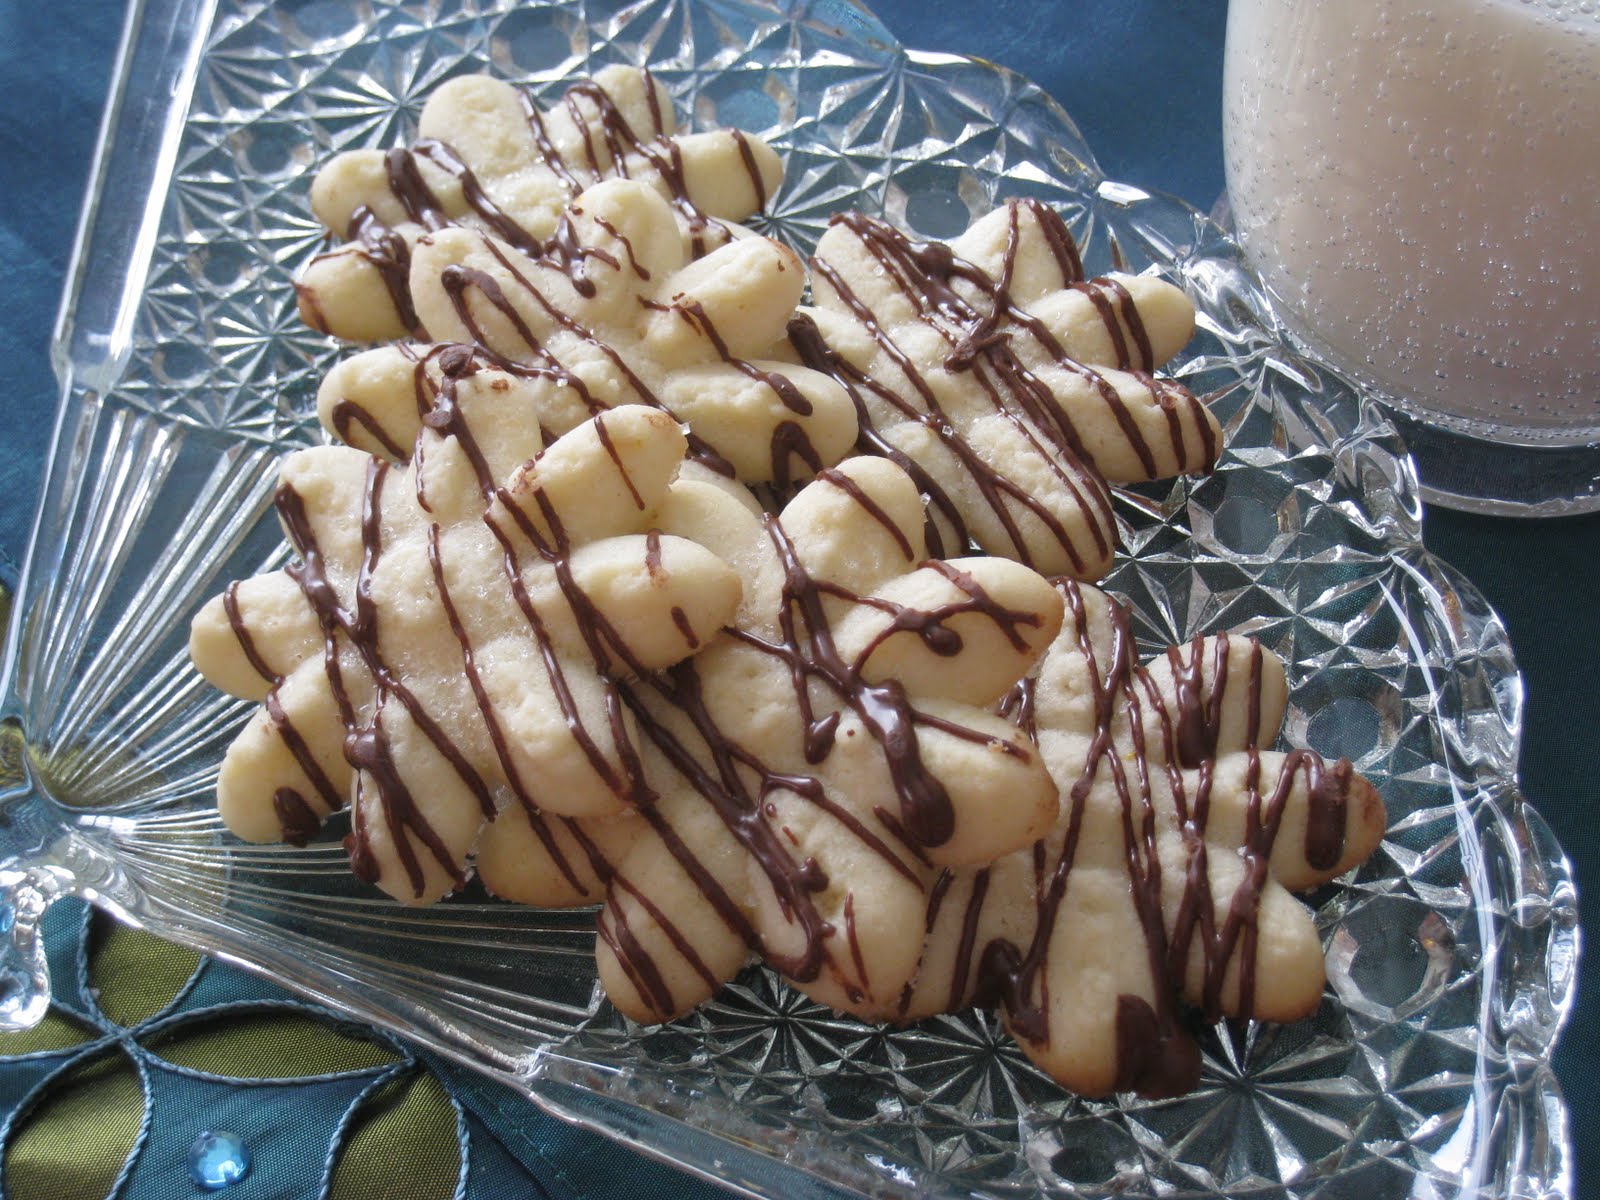
The other cookie I made was Orange and Chocolate Spritz Cookies and that was just because I wanted to play with my Pampered Chef Cookie Press (LOVE that thing!!).

Orange and Chocolate Spritz
1 cup softened butter, softened
3/4 cup sugar
1 egg
1 tsp orange extract
1 tsp freshly grated orange zest
2 1/4 cups all-purpose flour
1/2 tsp salt
Heat oven to 375*. Combine butter and sugar, beat until creamy. Add egg, extract and zest, beat until well mixed. Reduce speed to low and add flour and salt. Beat until well mixed. Place dough in cookie press and form shapes 1 inch apart on ungreased cookie sheets. Sprinkle with coarse grain sugar if desired. Bake for 8 to 10 minutes or until set. remove to wire rack and cool completely. Melt 1/2 cup semi-sweet chocolate chips until smooth. Drizzle melted chocolate over cooled cookies if desired. Yield: 3 1/2 dozen

The stars are brightly shining
It is the night of the dear Savior's birth
Long lay the world in sin and error pining
Till he appeared and the soul felt its worth.
A thrill of hope the weary world rejoices
For yonder breaks a new and glorious morn!
Fall on your knees
Oh hear the angel voices
Oh night divine
Oh night when Christ was born
Oh night divine
Oh night divine
Hands down my favorite Christmas song, I love when someone can REALLY sing it. My favorite is Billy Gilman, he is amazing! He belts it out here, live, at Disney back in 2000. I think he is 22 now so he was 12 in this clip...wow, his mom must be proud!
So, I wish all my sisters and their families a peaceful and divine Christmas eve, may our hearts be filled with gladness at the birth of our Lord and Savior!

In keeping with the cookie extravaganza of this week, here are the recipes I made for the cookie exchange. I made half of the recipe for The Chocolate Hazelnut cookies gluten free for sister S using the flour she gave us. They have Nutella in them along with ground hazelnuts. I found the hazelnuts, bagged, in the baking aisle right with the walnuts and pecans etc. I was actually surprised to find them so easily, I had visions of having to buy them whole and crack them open (you're right, I just would have picked a different recipe!) Anyway, then I ground them in my coffee grinder. I figured if a little nut-dust was left in the grinder it would just become hazelnut coffee (I'm a genius, I tell you, a genius!).
The other cookie I made was Orange and Chocolate Spritz Cookies and that was just because I wanted to play with my Pampered Chef Cookie Press (LOVE that thing!!).
Orange and Chocolate Spritz
1 cup softened butter, softened
3/4 cup sugar
1 egg
1 tsp orange extract
1 tsp freshly grated orange zest
2 1/4 cups all-purpose flour
1/2 tsp salt
Heat oven to 375*. Combine butter and sugar, beat until creamy. Add egg, extract and zest, beat until well mixed. Reduce speed to low and add flour and salt. Beat until well mixed. Place dough in cookie press and form shapes 1 inch apart on ungreased cookie sheets. Sprinkle with coarse grain sugar if desired. Bake for 8 to 10 minutes or until set. remove to wire rack and cool completely. Melt 1/2 cup semi-sweet chocolate chips until smooth. Drizzle melted chocolate over cooled cookies if desired. Yield: 3 1/2 dozen
Does anyone else wish that Christmas cookies could be staggered through out the whole year?? I get very overwhelmed with them right now, eating them I mean. There are just too many that look really awesome to make and eat. And then come May or August a Christmas cookie would be so exciting! Maybe we should do a year round cookie exchange...each sister gets a certain month to make and share cookies?? Just an idea!
Merry Christmas everyone!!

Wednesday, December 22, 2010
My Favorite Christmas Cookie

Dear Blog Readers,
Please let me tell you about my favorite Christmas cookie. It was first introduced to me by my mother-in-law and quickly became my favorite cookie of the season. I would look forward to the box of cookies that she would give us each year and try to nab all my favorites. I would even go so far as to make a "deal" with my husband that if I didn't eat his caramel oatmeal chewies, he would leave my Scandinavian Almond Bars alone. Oh! yes! that is their name, and I've shared the recipe with you below!
1 3/4 Cups All-Purpose Flour
2 Teaspoons Baking Powder
1/4 Teaspoon Salt
1/2 Cup Butter or Margarine
1 Cup Sugar
1 Egg
1/2 Teaspoon Almond Extract
Milk
1/2 Cup Sliced Almonds
Stir together flour, baking powder and salt. In a large mixer bowl, beat butter or margarine till softened. Add sugar and beat till fluffy. Add egg and almond extract and beat well. Add flour mixture and beat till well mixed.
Divide dough into fourths. From each into a 12 inch roll. Place 2 rolls 4-5 inches apart on an un-greased cookie sheet. Flatten till 3 inches wide.
Brush flattened rolls with milk and sprinkle with almonds. Bake at 325 for 12-14 minutes or till edges are lightly browned. While cookies are still warm, cut them crosswise at a diagonal into 1-inch strips. Cool. Drizzle with Almond Icing
Almond Icing:
1 Cup Powdered sugar
1/4 Teaspoon Almond Extract
Milk (enough to make the icing of drizzling consistency
Enjoy!!! I didn't take any pictures during the baking process, but I did receive some nice feed back about how the cookies came out!!
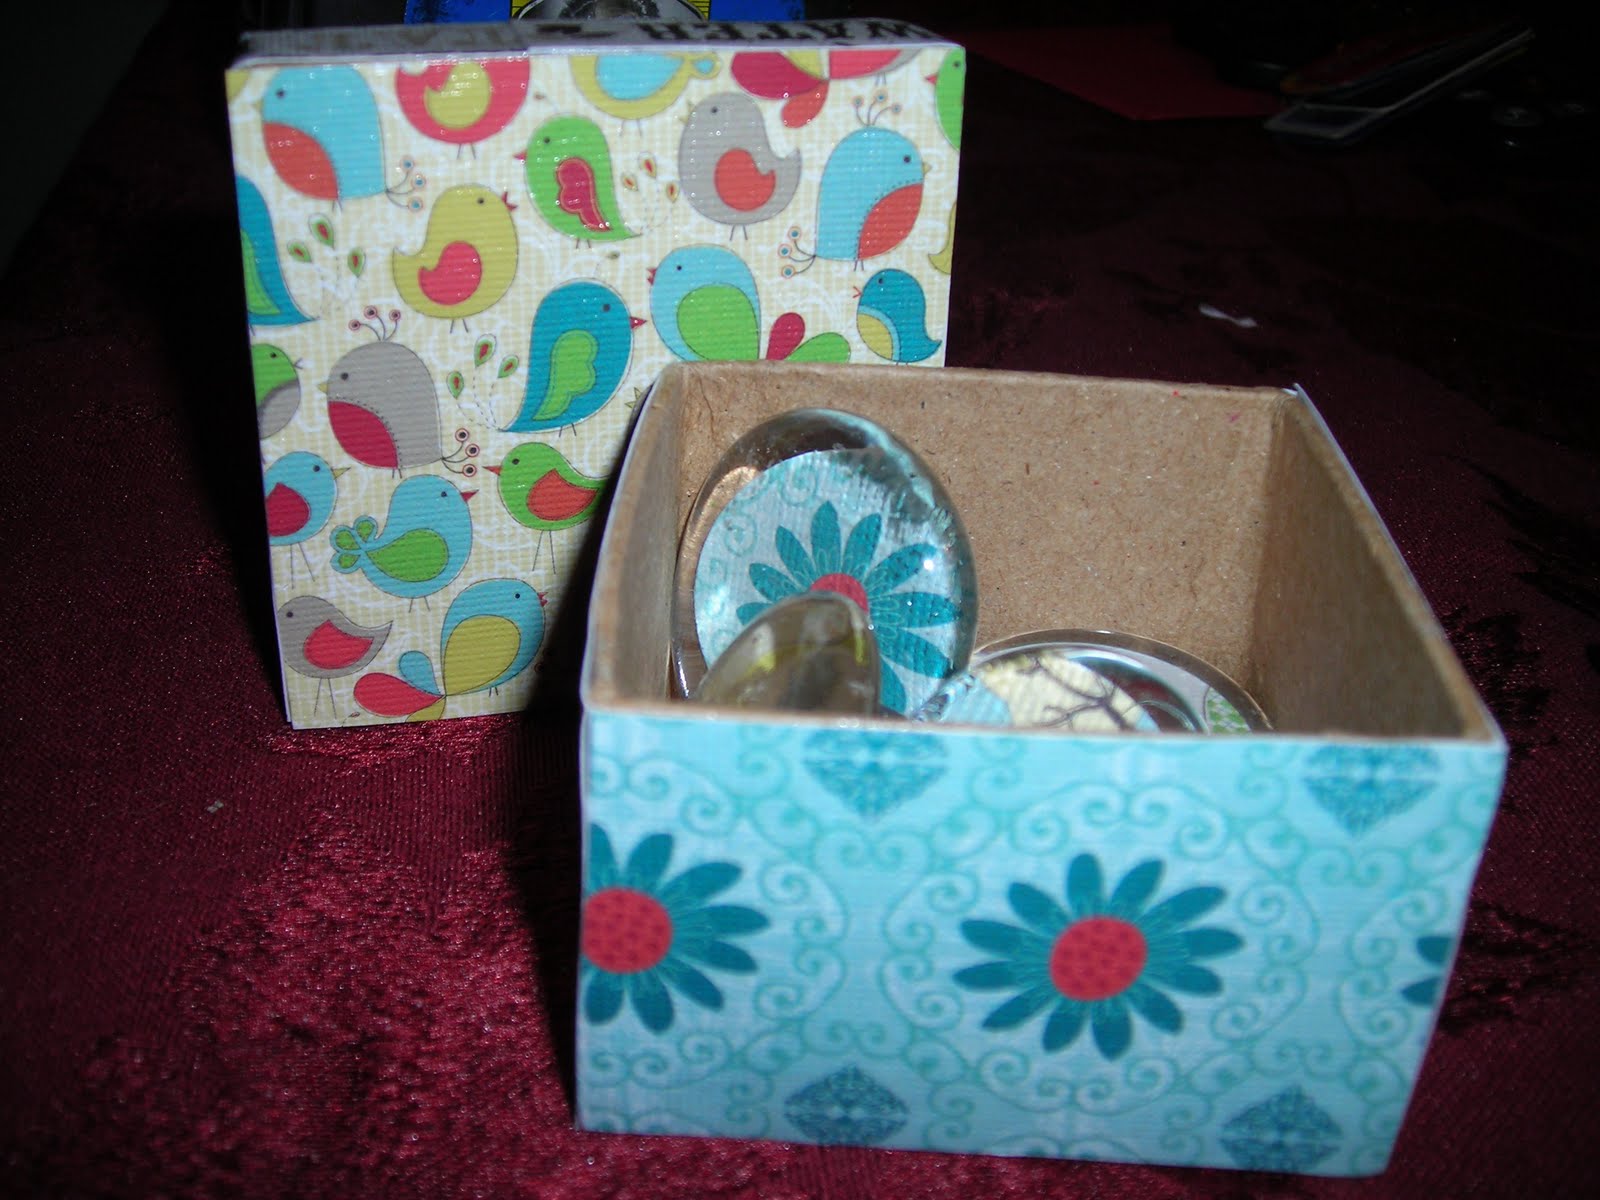
Do you remember the magnets we were making a few weeks ago? I managed to use some of the extra scrap-booking paper to decorate some empty boxes and I am going to use those as the gift boxes when I give them out. They came out so cute! They perfectly hold 4 magnets.


better than martha
 This week is cookie theme week at 7Sisters, however I (following diligently on my Christmas calendar) was ahead of schedule and posted on mine last week (oops!) . You can find that fun post (with hilarious story and recipe) here. A quick gluten free tip to my fellow anti-wheaters out there... I gave some of the girls a cup of Bob's Red Mill all-purpose gluten free flour mixed with a tea of xanthan gum for them to bake my cookies. I'm so glad they were all up for making me a gluten free version of their cookies (or caramel, YUM) and took on the challenge, ALL of their cookies taste WONDERFUL!!! Thank you sisters!! :)
♥J described the cookie exchange perfectly in her post earlier this week. I can't say enough about having such wonderful encouraging friends who you know will pray for you and lift you up day by day! So thankful for all my wonderful friends, near and far. :)
Not wanting to deviate from the theme however, I wanted to share what I learned this year about cookie exchange packaging. Because, let's be honest. Sometimes it IS what's on the outside that counts....in this case at least.
So, below is my easy-to-follow, no-fail, six-step guide to memorable and delectable Christmas cookie packaging. Hopefully next year I will really be able to raise the bar using these tips instead of solely relying on a store bought Martha Stewart brand! I did raise the bar from my packaging last year, but I can always do better!
 L to R, top to bottom: Nel, Mar, Jenn, J
You can use a Christmas box, a bell jar, a fancy Chinese take-out box, a tin, (even a Martha Stewart basic box is a good place to start!). At the 7Sisters cookie exchange, the containers were as different as we are! Not only is your pretty container a great way to present your cookies, but the giftee can re-use it in their decorating the next year, store Christmas ornaments in it, etc. etc. And using a pretty container doesn't mean you have to break the bank. You can find these for as little as a dollar at craft stores, particularly if you wait till closer to Christmas Day when everything is marked off! The Dollar Tree is a great place to find tins, and if you were feeling really creative, you could even buy the plain brown cardboard boxes found at craft stores for cheap and mod-podge them!
 L to R: J, MJ
Whether you tie it in a big bow on top, or a simple knot to the side, a pretty piece of ribbon always gets things looking more festive. And it doesn't even have to be ribbon either! Get creative and use some Christmas colored string or thread. If you crochet or knit, save your scraps or leftover skeins and use those to decorate your cookie container!
 #3. Personalize
Nel had the most beautiful red birds on her fancy take-out boxes that matched her tags, it was so sweet! She used her cricut machine, but you could use anything from a pretty sticker, to a sweet monogram chipboard letter, to a fancy jingle bell tied to the ribbon. Whatever says "hi, this cookie box is from me, and you'd probably be able to guess it without me even signing my name" :)
 L to R: J, Mar
#4 ties in with #3 and may even be synonymous in some cases. Take Mar for example, her personalization was all about the gift tag. She painstakingly printed and cut out each of our blog monikers to use on her tags! I can tell it's from her from how she tied on her ribbon (more on that below), and it was in a very sweet tin. If you have gorgeous handwriting like many of the sisters you can hand write your tags, but if you're more like me with a hideous Hancock, you could go the Mar route and print your tags! Don't stop there though, you can mount the tag on pretty paper, or even some shiny tin foil backed by some sturdy cardstock! Remember, your tag and your personalization is going to be your handmade stamp on the cookie package. Make it memorable! (It's funny that I'm thinking of this all now, after the fact, I could have done much better on my boxes - I will blame part of it on an unforeseen size issue of the first Martha boxes I got and then being in a flurry to put them together 15 min before the cookie exchange! eek! Better luck next year, I WILL top myself!)
 L to R: Mar, Jenn
Ok, so you probably weren't expecting this category, but consider this; you receive a beautifully packaged cookie container from a friend. It looks SO beautiful that you imagine you would just faint at the sight of the cookies that could be inside. But it's so tied down with ribbon that you can't! What to do?! That's why I've included this category. After all, when you get right down to it, it IS about the cookies. Right? Or am I contradicting myself now? Anyway....As you can see from the photo on the left above, Mar had an ingenious idea for her ribbon (and also cost-saving as well, since you use less ribbon in this scenario!)- she tucked the ribbon under the top of the tin and taped it to the underside to keep it in place. Genius! The packages this year were great on this category, the jars were so easy to open and take a look at, the boxes and tins opened in a flash, allowing for easy drooling onto the cookies, and etc!
 L to R, top to bottom: Jenn, MJ, J, Nel
So, your giftee just easily opened your cookie container after oogling the packaging. But what do they find? Why, perfectly placed cookies, of course! Use mini cupcake sleeves to hold fudge, and as ♥J did, wrap candies in wax paper. Stagger your cookies if they are in a box to allow for easy and delicious viewing upon opening. Throw some Hershey Kisses in the mix if you have some gaps. Add pretty tissue paper to the bottom, and make sure to use wax paper between layers if you think your cookies will stick together! Be careful about putting strong contrasting flavors together (such as mint fudge and chocolate chip cookies- the chips in the cookies will take on the mint flavor). My Martha Stewart boxes were nice and deep, and I had some extra room after I put the top piece of tissue paper on, so I folded a lovely origami ornament to place on the top of the tissue paper, to be a surprise, and the first thing seen when opening my box!
Speaking of being all wrapped up, the poor Marshmallow had an incident with a pesky icicle and a persistent licker. He is healing quickly, but could use a little love this week.

Did anyone else participate in a cookie exchange this Christmas season? If so, please feel free to link to a photo/blog in the comments, I would LOVE to see and gather more ideas! I sure do need em to keep up with my sisters! :)
Merry Christmas Eve Eve Eve!!

Linking to:

Monday, December 20, 2010
Yummy Cookies

Ready for more of the yummiest seven sisters cookie recipes!!! Here goes!
This year I made Iced Applesauce Oatmeal Cookies (which I blogged about in a previous post), and Italian Meatball Cookies topped with a chocolate ganache. I wrapped them in a beautiful red tin and gave them out to my seven sisters at our annual cookie exchange/Christmas party. This year it was a blast, maybe because we didn't stress out about making ornaments this year.

(makes about 2 1/2 dozen)
** Edited to add; For the cookies, I added cinnamon chunky style applesauce instead of plain. Please use the link above to reach the recipe!
For the icing, I did this and it was easier to work with;
*1 3/4 cup confectioners sugar
*3 tbs pure maple syrup
*3 tbs water
*1 3/4 cup confectioners sugar
*3 tbs pure maple syrup
*3 tbs water
Italian Meatball Cookies
(This is my husbands dear Grandma Anna's recipe)
* 1 cup shortening
* 1 cup milk
*8 oz cream cheese (softened)
* 1 tsp vanilla
* 1 1/4 cup sugar
* 4 1/2 cups flour
* 4 1/2 cups flour
*5 tsp baking powder
* 1/2 cup cocoa
* 1/2 tsp cinnamon
* 1/4 tsp cloves
* 1/4 tsp nutmeg
* 1/2 cup nut meats (I used very finely chopped walnuts)
* 1 cup chocolate chips
Chocolate Ganache
* 1 cup whipping cream
* 12 oz semisweet chocolate
In a medium saucepan bring whipping cream just to boiling over medium high heat. Remove from heat. Add chocolate (Do Not Stir). Let stand 5 minutes. Stir until smooth.
Preheat oven to 375 degrees
Mix all ingredients together until it forms a soft dough. Refrigerate for 1 hour. Roll the dough into little balls about the size of walnuts. Bake for 13-15 minutes. Let cool. Make a soft icing and dip tops of cookies into the icing, let set.
Below is a picture of Italian Biscotti that I made with my mother in law for Christmas. It is the most delicious Biscotti I have ever tasted. It goes perfectly with a nice cup of coffee or hot chocolate.

This year we had to make our Christmas tree childproof since little E is only 10 months old. So instead of putting any bulbs on the tree, we did pine cones and gingerbread men, this is how it turned out. Little L thinks its the prettiest tree ever! Children are so precious.


Sunday, December 19, 2010
Little Bit of Love

Our Christmas cactus is now flowering the first year ever!!!! This is a cutting from a plant that is almost 70 years old!!!!

Our Vintage tree....as requested....

Chocolate Crackles


Chocolate Crackles


Chocolate Crackles
8 ounces bittersweet chocolate, finely chopped
1 1/4 cups all purpose flour (substitute rice flour for gluten free)
1/2 cup unsweetened Dutch-process cocoa powder
2 teaspoons baking powder
1/4 teaspoon of salt
1/2 cup (1 stick) unsalted butter, softened
1 1/2 cups packed light-brown sugar
2 large eggs
1 teaspoon pure vanilla extract
1/3 cup whole milk
1 cup of granulated sugar
1 cup confectioners sugar
1/2 cup unsweetened Dutch-process cocoa powder
2 teaspoons baking powder
1/4 teaspoon of salt
1/2 cup (1 stick) unsalted butter, softened
1 1/2 cups packed light-brown sugar
2 large eggs
1 teaspoon pure vanilla extract
1/3 cup whole milk
1 cup of granulated sugar
1 cup confectioners sugar
1. Preheat oven to 350 degrees. Melt chocolate in a heatproof bowl set over a pan of simmering water, stirring. Set aside, and let cool. Sift together flour, cocoa powder, baking powder, and salt in a medium bowl; set aside.
2. Mix butter and brown sugar on medium speed until pale and fluffy, 2 to 3 minutes. Mix in eggs and vanilla, and then the melted chocolate. Reduce speed to low; mix in flour mixture in 2 batches, alternating with the milk. Divide dough into 4 equal pieces. Wrap each in plastic; refrigerate until firm, about 2 hours.
3. Divide each piece into 16 (1-inch) balls. Roll in granulated sugar to coat, then in confectioners' sugar to coat. Space 2 inches apart on baking sheets lined with parchment paper.
4. Bake until surfaces crack, about 14 minutes. Let cool on sheets on wire racks. Cookies can be stored between layers of parchment in airtight containers up to 3 days.
Chocolate-Orange Peanut Bark
(makes about sixteen 3-inch pieces)
1 navel orange
1 pound bittersweet or semisweet chocolate, finely chopped
1 1/3 cups coarsely chopped unsalted peanuts (about 5 ounces)
1/4 teaspoon coarse salt
1. Line a 12 by 17 inch rimmed baking sheet with aluminum foil; chill. With a vegetable peeler, remove zest from the orange in long pieces (reserve the orange for another use). With a sharp knife, cut zest into very fine strips, about 1 inch long.
2. Place chocolate in a large heatproof bowl set over (not in) a pan of simmering water; heat, stirring occasionally, until melted and smooth. Mix in half the zest and peanuts. Immediately pour onto prepared sheet, spread into a 10 by 12 rectangle, about 1/4 inch thick. Sprinkle with the remaining zest and nuts and the salt.
3. Chill until firm, about 30 minutes. To serve, break into pieces. Bark can be refridgerated up to 3 days.
Subscribe to:
Posts (Atom)
:)
